Tuesday, May 15, 2012

New Logo 

Yay it's challenge time again at

This week were are lucky enough to have a sketch from the talented 
Diana Fisher!


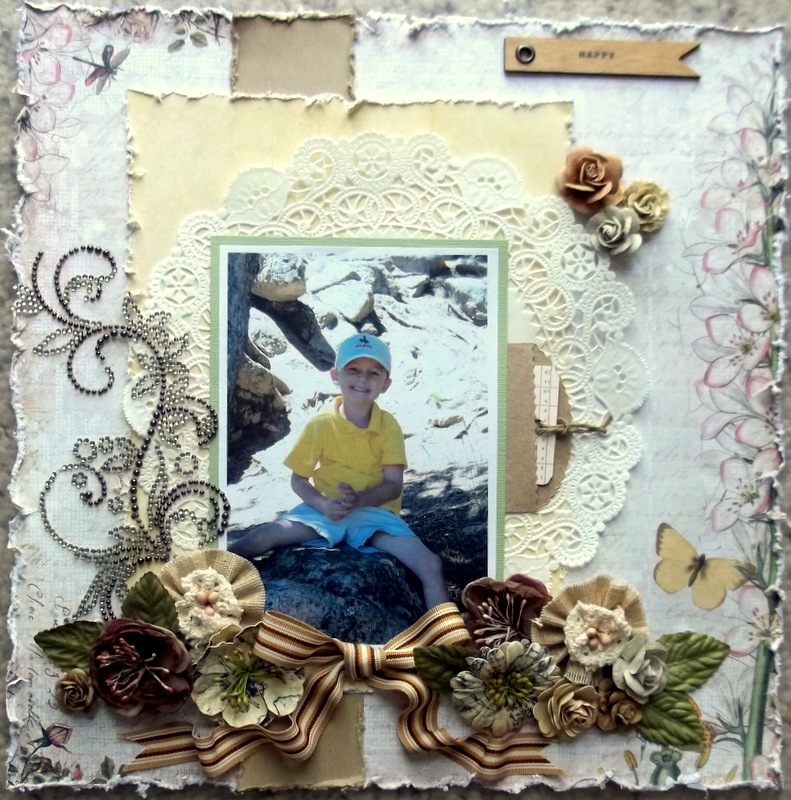
Here is my take on this week's challenge, hope you love it!

 This is a photo of my youngest son when he was born! WOW has he changed lol!!!

I decided to flip the sketch and use it in the opposite direction, and I also replaced the banners with a doilie!
The paper collection is G45's new 'Little Darling's Collection'


I hope you'll play along with us over at
for you chance to win this beautiful RAK


Sunday, May 13, 2012

Just wanted to take the time to wish all of you, Mother's, Grandmother's, Godmother's, Step Mother's and Soon To Be Mother's a 


Very Very
 Happy Mother's Day!


Saturday, May 12, 2012

New Logo 

It's Chalenge time over at 

This week's challenge is to use handmade flowers on your paper crafting project.


For all of y'all that know me well, know this is right up my alley!!!!


This is a layout of my middle daughter!
I used G45's new
Old Curiousity Shoppe Collection
for this page!

Lot's and lots of fussy cutting! A Dusty Attic chippie along with my handmade flowers and wallah!
My layout is completed!

Here's a link to my handmade flowers


Hope you play along with us for your chance to win this BEAUTIFUL RAK 
sponsored by


Click HERE for more details!


Friday, May 11, 2012

/ 


It's Fabulous Friday over at 

This week's challenge is to use 'Lacing' on a paper crafting project!

I was so excited when I saw this challenge because I haven't used lacing in my paper crafting projects in a while and I've been wanting to try it with embroidery floss!! This was the PERFECT excuse!

This is a layout of my middle daughter, She is such a sweet, sweet, tender hearted little girl and inspired me to be a better person everyday!!
For this page, I used G45's Little Darlings Collection, as well as an array of Kreaxions tools!'
 All available in the Just Imagine Kreaxions Store!!!

I used the circle cutter for 3 of the circle's above, before placing them on my doilies, on the smaller of the 2 teal circles I used the circlar punching template along with Punch #304 to jazz it up a bit!
I used the left over negative pieces from Punch #305 meant for the trash to create the pretty border around the larger circle!
Last but not least I created a double sided border using Punch #903 !!!

For my lacing I used green embroidery floss on the larger teal circle , I made a slit in it with scissors and then just stitched it back up!!!


I hope you've enjoyed my page and you'll play along with us at 
Frosted Design's
for your chance to win a RAK from this months sponsor

Wednesday, May 9, 2012


Website Banner
I have some 
SUPER EXCITING NEWS
to share with you all today!!!!!
I have made the 
Design Team!!

I will be joing this talented group of ladies:
Natalie Elphinstone – VIC, Australia
Suzette Edmond – United Kingdom
Jenifer Evans – USA
Jennifer Hodge – QLD, Australia
Cathy Lane – South Africa
Kate McCulloch – NSW, Australia
Rae Moses – USA
Jeni O’Connor – Canada/Australia
Donna O’Leary – New Zealand
Elena Olinevich – Belarus
Angella Peardon – NSW, Australia
Ro Philippsen – South Brazil
Amanda Reddicliffe – WA, Australia
Candy Rosenberg – USA
Sandi Smith – Canada
Ilene Tell – USA
Sonia Thomason – WA, Australia
Sharryn Thomson – NSW, Australia
Chantal Vandenberg – SA, Australia
Emilia van den Heuvel – the Netherlands

I hope you'll come and check us out!!


Tuesday, May 8, 2012

Handmade Punched Rose


I am such a fan of flowers on my paper crafting projects, I love to pile as many on as possible, but that can get a little bit pricey so I love using handmade blooms!

Today I wanna share with you one of my most favorite handmade flowers, sure to add that special touch to any crafting project!!


SUPPLIES
flower punch (it does not need to be the same as mine, it just needs to be a 4 petal punch)
enough paper to punch 4 flowers
scissors
some kind of skinny stick (I use a paint brush end)


STEP 1
Punch out 4 flowers all the same size.


STEP 2
 You will need to make your cuts in each flower
 Flower #1 you will just cut a slit into the flower between 2 of the petals and stop in the center
Flower #2 you will need to cut a petal from your flower using a pie slice shape, also stopping in the center.
Flower #3 you will repeat the same cut as flower #2 except this time when you make your pie slice cut you need to remove 2 petals instead of just 1.


STEP 3
For the last flower you will make a very different cut. Starting in between 2 petals cut into your flower just enough to leave enough room as to not slice off petals when you start your spiral cut to the center. You can make your spiral as many layers as you wish or as little. When you are finished it should look similar to the one above.


STEP 4
 Now it's time to adhere your cut flowers #1-3. All you need to do is dab a small bit of glue (fast drying works best) on the edge of the petal that was cut and slightly overlap the other side of the cut petal back to it, creating a cone shape.

STEP #5
Flower #4 is adhered a bit different. For this step you will need your skinny skinny (I used the end of a paint brush) and started at the opening of the cut flowers and wrapped in around the brush end in a spiral motion until I reached the end. I then put a dab of my fast drying glue on the bottom of the spiral cut flower and pressed the flower down over it holding firm for a few moments until it's dry.

STEP #6
When you have completed the above step you should have 4 flowers that look similar to these above.
The final step is to assemble your 4 flowers to create 1 beautiful rose.
You do this by adhering the each flower to the center of the other largest to smallest. So adhere flower #2 in #1's center and so on and so forth.


When you are done your flower should look similar to the one below!


Thanks for taking a look, I hope you have enjoyed!!!

Friday, May 4, 2012

/


Is  hosting their annual online National Scrapbooking Day Crop!!

We have challenges for you by many of  the DT members on their personal blogs as well as some fun things going on, on Frosted Designs Facebook page, be sure to stop by 
for a complete list of events!


I hope you'll participate in our crop and play along with my challenge for a chance to win a RAK from my personal stash! Challenge run through May 7th! 
Please also make sure that you become a follower on my blog!


Jenifer's Recipe For Scrapbook Success

Create any kind of paper crafting project using my recipe below!!


begin with1 piece of patterned paper as your recipe base
add some texture and character to your recipe with some distressing of any kind
  add in 2 piece's of cardstock for good measure
 everybody loves something sweet, add 1-2 photo's
add a secret ingredient (hidden journaling)
no need to measure just grab a handful of flowers to taste and toss them onto your recipe
spice it up with a little bling 
stir in your choice(s) of lace, ribbon or a doilie or 2
before serving, top it off with a special title to make your creation extra memorable
let it set, and serve on our Frosted Designs blog in the correct challenge link up!!

Here's a sample I created for you with supplies from ScrapThat!'s May 2nd Anniversary Kit 
interested in membership details? 
contact  


.
Be sure to stop by our Facebook page as well as other participating DT's blog's for even more chances to win!


Stop back by on the 8th to see if you are the lucky WINNER!!!