Wednesday, December 28, 2011

Christmas Photo's To Share

My Christmas Holiday was wonderful, hope yours was as well!
We just had so much fun, and the kids were all so excited with what Santa brought them!
Everything about the day was just absolutely perfect!

Here's a photo to share with you!


I'm looking forward to 2012 now, I'm hoping for it to be an amazing year,
wishing you all the best!
Love
Jenifer

XXXXXXXXXXX


Sunday, December 25, 2011

Merry Christmas

MERRY CHRISTMAS


Best wishes over the Holidays to you, your friends and families. Thank you for all your support and inspiration this year, it's truely appreciate more than I can express. I love you ALL! 

Vintage Christmas (4).jpg

Saturday, December 24, 2011

Pillow Box

So this is my very first pillow box, and it was so stinking easy I can't believe I've never tried this before! Even my 12 year old daughter made one on her own!

I'm affraid I have NO IDEA about the paper collection as it's old and has no labels on it. I saw it in my LSS and had to have it, but she didn't know the collection either, so if anyone could help me out that would be AMAZING!. It's not double sided but is cardstock texture. The snowflaked are glttered and raised.


There's really not much to explain here, I used a super old template that I also purchased from my LSS, I believe the brand was Darci's Country Store or crafts.....never heard of them before. The candies are Hershey's and I had to painstakingly eat a handful so I could use the wrappers to punch matching gold snowflakes to adorn the tops with......hard work I tell ya....lol. IN the center of each snowflake I added a gold bling piece to top em off. I also added a snowflake and bling piece in the center of the bow tied around the box. My LSS owner thought this set looked very Martha Stewart, lol and insisted she wanted to keep it to show off in the store, so I guess I'll have to eat some more chocolates to make some more.....darn, lol.

Like I said above I have no idea what collection this paper is, I wish I knew I know it's older but I really liked it, if anyone could help me out that would be so Amazing!

Hope you enjoyed, Happy Holidays!


Thursday, December 22, 2011

Shabby Chic Vintage Crinkle Ribbon

Shabby Chic Faux Vintage Crinkle Ribbon

 I love the crinkled rich look of vintage ribbon, and it's beautiful array of colors!
However original vintage ribbon can be a little bit costly for most of us. Below
I wanna share with you a cheap, easy way to make your own faux vintage
crinkle ribbon.

Supplies You Will Need:
Silk Ribbon (or any NATURAL fiber ribbon)
Glimmer Mist (any similar spray will work)
Brown or Bronze Colored Dye Based Ink (pigment will work as well but note it takes longer to dry)
Blow Dryer (NOT HEAT TOOL)
Rubber Gloves (optional)
Scrap Sheet Of Paper


Step 1
You first need to decide what size piece of ribbon you will need for your project *NOTE: it will
shrink up a bit due to the crinkle technique and the heat you apply to it. So you may want to cut
it slightly larger than your desired length.

Step 2
You may want to wear the rubber gloves for this step, although glimmer mist washed off pretty easily
so it's ok if you do not have them to wear. Be sure and complete this step over the top of your scrap
sheet of paper to avoid any mess from the mist on your workspace. Place ribbon in the cupped palm
of your hand and spray the mist onto the ribbon, rolling it around in your hand to sop up all the excess
mist soaking completely.


Step 3
**THIS STEP WILL BE HOT ON YOUR HANDS, SO YOU MUST TAKE EXTREME CAUTION TO
AVOID BURNING YOURSELF**
Start by wadding the ribbon up in your hands a few time to get it nice and crinkled up. Continue
this crinkle technique while using the blow dryer on your ribbon to assure that it dries crinkled and
not flattened back out. I like to keep it cupped in my palm while doing this to avoid it room to spread
back out. HOWEVER PLEASE NOTE THAT IT DOES GET HOT!!


Step 4
Once your ribbon is 100% dry it's time to add the finishing touches to give it that old worn antiqauted
look. For this step it's best to use dye based ink because it dries faster, but pigment based inks will
work, just allow them to have a bit more dry time before you try to use the ribbon on a project. Lay your
ribbon back down on your scrap piece of paper and gently press your ink pad over the top of it here and
there sparcely by applying very gentle pressure....you do not want big ink glob spots.


Allow dry time and
it's ready to use...your very own shaby chic faux vintage crinkle ribbon!!!!


Wednesday, December 21, 2011

Some Exciting News


I am so honored to have been invited to be a part of
new Design Team!!

New Logo

I will be working beside a very talented group of ladies to bring you inspiring examples and fun ideas and tutorials for the next 6 months!


Abby/ Ownwer


Suzanne/ Owner


Kate


Sandi


Jenifer (hey that's me!)


Please Take a moment to visit each of their blogs and become a follower!

Stay tuned to The Paper Variety for upcoming DT introductions for each DT member

Our first challenge starts on January 1, 2012, be sure you check it out and play along for your chance to win!


Tuesday, December 20, 2011

Prima BAP Challenge

Another first today, this will be my first time playing along in Prima's BAP (Build A Page) challenge!

This month's sketch was beautiful and I couldn't resist!

2011 December
So many possibilities right?!?1

Here's my take on this Beautiful sketch:


The paper's are Prima's Fairy Flora and Annalee Collections. I used the scissor method to distress and added some border stiching around the edges.

The photo is of my my daughter's BFF and close family friend. She's my lil "Tater Tot" like a bonus daughter!


Here's a close up of the flower cluster on the left side, it's a mix of Prima, handmade blooms,  floral picks and sparkly filler. Topped off by a pretty gold bow and vintage clear yellow button.

This is a close up of the flower cluster on the right side, also featuring Prima, handmade flowers and some floral picks and fillers.

This seems to pop more IRL than it does in this photo. It's just a generic cheapie white glitter alpha set I had lying around that I altered with gold stickles, by dabbing my fingers over the stickle piles and spreading it around the letters.


You can see the doily and paper layering as well as the distressing in this close up. Instead of using 3 photo's I chose to let the doily and the gold paper respresent the photo spot in it's place.


I hope you have enjoyed my page and thanks for stopping by!

I appreciate all comments!


Sunday, December 18, 2011

Bo Bunny Challenge / Stuck On You Sketches

This is my very first time to play along in one of Bo Bunny's challenges, as well as Stuck On You Sketches, so I'm super excited!!!

Bo Bunny's challenge was to use circles on your layout, which I thought worked AMAZINGLY with
Stuck On You Sketches December sketch.


Perfect right?!?!?!


So here's what I came up with between the two:


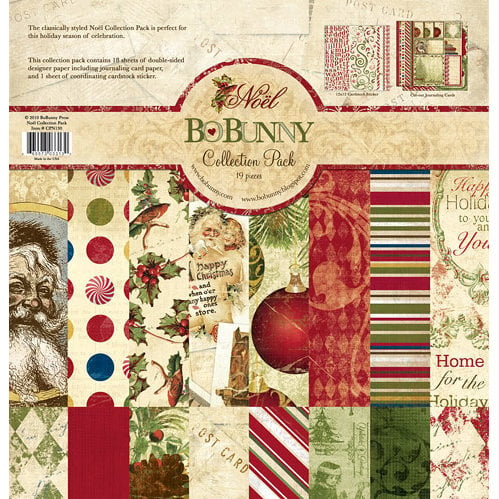
I used Bo Bunny's Noel Collection on this layout.

Bo Bunny Press - Noel Collection - Christmas - 12 x 12 Collection Pack, CLEARANCE

The photo is a pretty old one actually. It's my first 3 children on Christmas morning back in 2002 at my In Laws home. I love this photo, my baby was crying, the whole Christmas thing was kinda scaring her, lol and my son was trying to console her, lol that why she's looking up at him.


I used the scissor method to distress all the paper to grunge it up a bit and I flipped the sketch on it's side for the design.


Here's a close up of the flower cluuster, using Prima's Moulin Rouge collection on the left side, enhanced with a handful of floral picks (my new addiction) I also added one of my trademark huge bows, topped off with a pretty gold button. 


This is a close up of the flower cluster on the right side, you can also see the lace, punch work and Zva pearls.

I fussy cut this from another paper in this collection and used my gold stickles to enhance the swirly design. I also used gold wire to mimic the ornaments string and a bow on the top of each topped off with a bling piece.

This close up shows all the layers of patterned paper and distress work.


I hope you have enjoyed my page as it's one of my new FAVS!

Thanks for stopping by, I enjoy all your sweet comments!

Friday, December 16, 2011

Some Purple Inspiration For You

I usually DON'T like o scrap with the color purpl, but I have played with a few collections lately that have left me swooning for more! I am dying to get in my scrapbook room and get my purple on so I turned to Pinterest.com for some purple inspiration. I found such pretty things I thought I'd share with you as well!

Ivy and stone steps lilac purple purple purple


lavender
lavender lavender Lavender

Ok tell me your not inspired!!!! Isn't it so pretty?!?!

Now off to my scrap room to put this week's inspiration to work

Thursday, December 15, 2011

ScrapFIT and scrap Your Crap Reveal

I have 2 Reveals for you today from ScrapFIT and Scrap Your Crap


Scrap Your Crap

This weeks challenge over at Scrap Your Crap is to use buttons buttons and more buttons!

You know you have them.... a huge stash just sitting there, so why not see how you can incorporate them onto your projects and use up some of that stash???

Here is what I created for this weeks challenge:

HAPPY BOY


I Authentique's Journey Collection to create this page.

Journey

I used a plastic decorative doily on the upper left side behind the photo and Tim Holtz Broken China Distressed Ink on a make up sponge to create the masked look. I scissor distressed all the paper's edges to grunge it up and age it a bit. The flowers are a mix of handmade, Prima and Webster's Bloomers. And my buttons are at the bottom to draw out some more yellow.

Don't forget to stop over at Scrap Your Crap and check out the examples from the other DT's and link your own creation for your chance to win!


__________________________________________________________________________________


ScrapFIT Workout #

This weeks workout challenge over at Scrapfit is to use wallet sized or smaller photo's on your layout. 

Here is my take on this weeks workout

This is a layout of my youngest daughter, such a cheesball, lol look at those faces, lol. I love this kid, no matter what kind of day I am having she has the ability to make me laugh and smile. Just look at her, who in the world could resist?

For the background paper I used Prima's Melody Collection. It's so GORGEOUS on it's own I really didn't do as much as it looks like here. I added a doily behind the photo's that misted first and then cut the center out of.  I also placed some lace under the photo's edges so that it would peek out from the bottom of the flowers. I think I may have went a little flower crazy, but that's ok I love flowers!!! I actually choose to get rid of some silk flowers here....I just liked the way they worked on the page. I added a MME sentiment at the top for my title and dressed it with flowers as well, and there you have it. It really was a quick and easy page.

Be sure you stop in over at ScrapFIT to check out the samples from the other Fitgirls and play along for your chance to win!


Hope you enjoyed my reveal's and join me at each challenge blog to play along for your chance to win!

Tuesday, December 13, 2011

Scrap Yourself Reveal

Scrap Yourself
This weeks topic over at Scrap Yourself is
The Christmas Spirit
and what it means to you.

I would definitely have to say as most of us would that Christmas is much different as an adult than it was a child for sure. Now instead of spending the whole month of December in a euphoric trance waiting for Santa and wondering what will be in sack for you, you spend the whole month of December trying create this same  feeling you experienced as a child for your own children. We go through great lengths to keep the integrity of Santa, Elves, his Reindeer and the whole myth alive for our children. But I cannot say I mind at all I love watching how happy it makes them and seeing my own face in theirs as that joyful much anticipated day draws closer.

We start our Christmas traditions the weekend before Thanksgiving actually. We like to transform the house into Santa land, lol. This is a huge job, lol I think it took us 8 hours this year, lol. We pack away everything in the living room and dinning room and put  out our many Holiday items instead. We even put up 2 trees. The one in the dinning room is reserved to look more elegant and the one in the living room is for all of our modge podge of ornaments we've collected over the years along with all the treasured items the kids have made us over the years in school. We leave the tree in the living room empty with only lights on it and on Thanksgiving day when the whole family is here, we let the kids decorate it.  The kids really enjoy this and the grandparents really appreciate being a part of the kids holiday traditions as they don't get to do this with own children anymore. The kids love all their pretty holiday things out for the month. I love to walk into the living room and see one of them fiddling some of the decor. Never fails whether it be a snow globe they are shaking vigorously or changing the numbers on the how many days til Christmas countdowns we have.

On Christmas Eve the kids and I spend the day cooking and baking away, we make platters and platters of holiday cookies. Oh I can just smell gingerbread men just talking about it. Anyway we put the cookies and milk out for Santa as most people do and the kids wake up the next morning and usually find Santa's ball off the end of his hat lying near the platter of cookies....lol. We always try to think of little details like that to keep the spirit alive.

I hope one day they will have the opportunity o make these kind of memories with their own children and pass down stories of their own favorite holidays and traditions. It's not about material things or how many gifts you get but the memories you make.


This is my take on this week's challenge. It's a layout of me stringing lights on the tree.

I used Riddersholm's I Believe and The Day Before Collections for this page. I misted the doily behind the photo and cut out the center. The sentiment is from Bo Bunny's Father Christmas collection and the flowers are Prima. I used some filler I found from my local craft store, in the hploiday section, behind the flowers to make them look more drmatic, The cherubis actually a Christmas ornament that I was dying to add on a page, lol and this one happened to be perfect.


Don't forget to link your take on this weeks challenge for your opportunity to win Sarinda's handmade necklace she so generously donated as this week's RAK!


Monday, December 12, 2011

Winter Whites

Although I hate the bitter coldness it brings I do love the look a beautiful winter storm can bring. I mean who can resist that soft fluffy white spread all over the ground in all it's shining glory or the perfectly pointed icicles neatly hanging from your rooftops like a prop on a movie set. My favorite of all though has to be when the snow is a soft steady straight snow (those of you who live in snow areas are gonna be able to relate to this)....you know the kind that brings those big beautiful snowflakes. The kind that fall so soft and slow that you can actually see their shape and catch em on your nose and mouth if you are lucky!

I wanted to capyure this look and the feelings they bring into a Christmas card, by using all whites, with some hints of silver glimmers and sparkles.


I started off with a piece of plain 8x11 white cardstock. I just used a template for a chevron and placed it halfway onto my folded carstock to obtain the shape. I handcut the icicles free handed, really no biggie as icicles are not perfect in width or length anyway, then I used my silver stickles to outline the edges. This takes a while to dry so just set it aside on a flat surface and give it a while to do it's thing. I was unpatient on my first try and tried to speed up the process with my heat......it honestly just blew the stickles off the paper. So just let it dry on it's own it's less of a headache.

While I waited for it to dry I cut out a medium and a small size sheild shape for the sentiment. I used pop dots on the second layer to give some much need dimension. The sentiment and lil snow flakes in light silver is actually done by a generic stamp.....I thought the ink was to suttle so I traced the sentiment in a silver pen. One the stickled icicles dried I placed them in the center of the card with a silver trim above them. I placed the sentiment over the top. I used liquid pearls around the edges of the card and sentiment for some more softness and added dimension. Then I layered differet size, shapes and colors of icicles  in the corner. I toped it off with a soft silver bow and used hot glue to gather the tails in a scrunched up fashion. I placed a pearl in the bows center to finish the job!


Here's a few close up's


I hope you enjoyed my card and are dying to bring that beautiful winter scene onto your own creations! Remember the trick to using all white is to have layers, different textures and demension.

Happy Scrapping

Saturday, December 10, 2011

Snapshot Sunday

Today I have a few of our home holiday photo's to share with you, although not perfect these moments are my Favorites and they will be times I will never forgt. Times I will cherish for the rest of my life that I got to spend with my children. I am so thankful for the life I have.