Shabby Chic Faux Vintage Crinkle Ribbon
I love the crinkled rich look of vintage ribbon, and it's beautiful array of colors!
However original vintage ribbon can be a little bit costly for most of us. Below
I wanna share with you a cheap, easy way to make your own faux vintage
crinkle ribbon.
However original vintage ribbon can be a little bit costly for most of us. Below
I wanna share with you a cheap, easy way to make your own faux vintage
crinkle ribbon.
Supplies You Will Need:
Silk Ribbon (or any NATURAL fiber ribbon)
Glimmer Mist (any similar spray will work)
Brown or Bronze Colored Dye Based Ink (pigment will work as well but note it takes longer to dry)
Blow Dryer (NOT HEAT TOOL)
Rubber Gloves (optional)
Scrap Sheet Of Paper
Glimmer Mist (any similar spray will work)
Brown or Bronze Colored Dye Based Ink (pigment will work as well but note it takes longer to dry)
Blow Dryer (NOT HEAT TOOL)
Rubber Gloves (optional)
Scrap Sheet Of Paper

Step 1
You first need to decide what size piece of ribbon you will need for your project *NOTE: it will
shrink up a bit due to the crinkle technique and the heat you apply to it. So you may want to cut
it slightly larger than your desired length.
shrink up a bit due to the crinkle technique and the heat you apply to it. So you may want to cut
it slightly larger than your desired length.
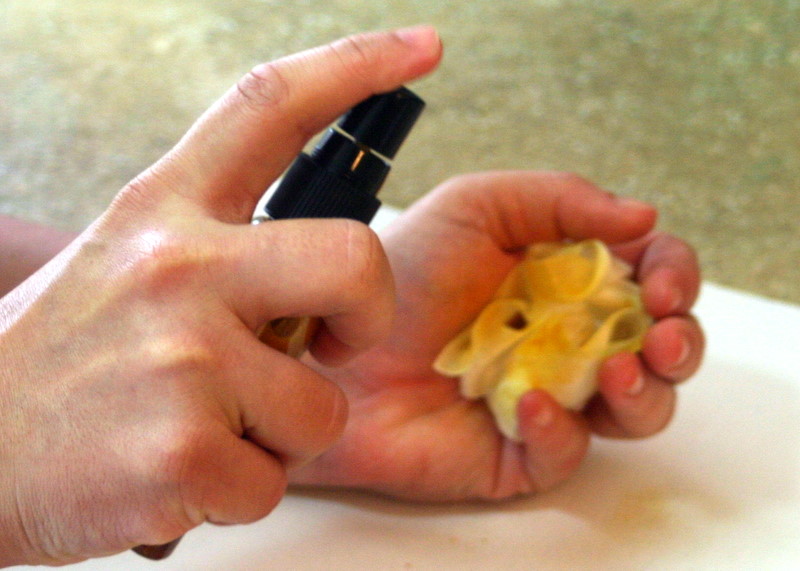
Step 2
You may want to wear the rubber gloves for this step, although glimmer mist washed off pretty easily
so it's ok if you do not have them to wear. Be sure and complete this step over the top of your scrap
sheet of paper to avoid any mess from the mist on your workspace. Place ribbon in the cupped palm
of your hand and spray the mist onto the ribbon, rolling it around in your hand to sop up all the excess
mist soaking completely.
Step 3
**THIS STEP WILL BE HOT ON YOUR HANDS, SO YOU MUST TAKE EXTREME CAUTION TO
AVOID BURNING YOURSELF**
Start by wadding the ribbon up in your hands a few time to get it nice and crinkled up. Continue
this crinkle technique while using the blow dryer on your ribbon to assure that it dries crinkled and
not flattened back out. I like to keep it cupped in my palm while doing this to avoid it room to spread
back out. HOWEVER PLEASE NOTE THAT IT DOES GET HOT!!

Step 4
Once your ribbon is 100% dry it's time to add the finishing touches to give it that old worn antiqauted
look. For this step it's best to use dye based ink because it dries faster, but pigment based inks will
work, just allow them to have a bit more dry time before you try to use the ribbon on a project. Lay your
ribbon back down on your scrap piece of paper and gently press your ink pad over the top of it here and
there sparcely by applying very gentle pressure....you do not want big ink glob spots.

Allow dry time and
it's ready to use...your very own shaby chic faux vintage crinkle ribbon!!!!
Love it!!!
ReplyDeleteHey you!! Glad I found your blog. Your work is awesome... Thanks for this tutorial. Have a merry Christmas xoxo Nadia
ReplyDelete